|
|||||||
 |
 |
||||||
 |
|||||||
 |
|||||||
|
|||||||
|
|
||||||
|
|||||||
|
|||||||
|
Saber for the Dark SidePage Three
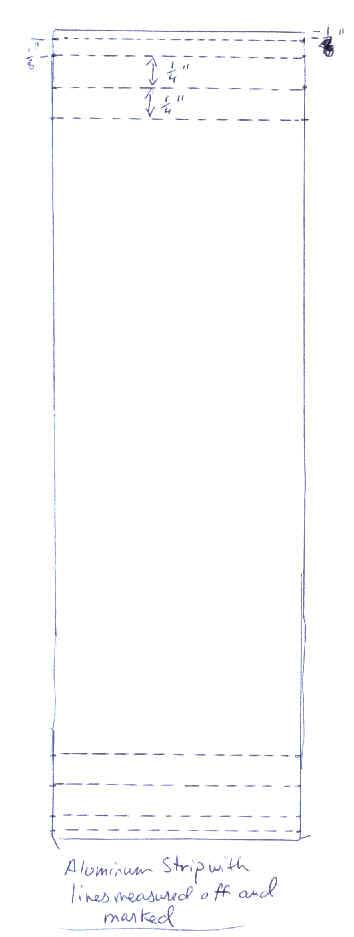
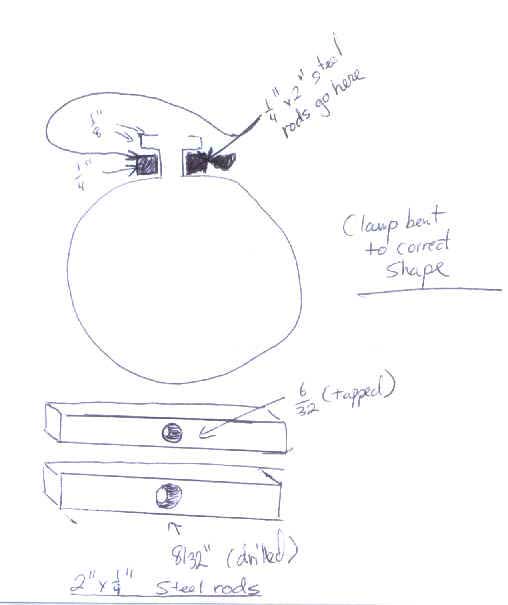
( fig. 8 - Aluminum strip bent to the correct shape) Once you've bent the aluminum in the appropriate shape, you need to create the two 2" steel rods that will slide within the two 1/4" areas of the clamp. These rods will be drilled and tapped so that a screw will fit through one end and fasten down the other end so that the clamp is tight. Measure off a 2" length of the 1/4" steel rod and cut the rod with a hacksaw. Putting the rod in a bench vise will make this much easier. Then measure off another 2" length and cut it off. Now, use a punch to drive a dent into the center of both of the rods. This will keep the drill bit from walking as you drill through a hole through the center of the rods. Take one rod and clamp it down to the drill press and use a 8/32" bit to drill a hole through it. Take the second rod, clamp it down, and drill it through with a 7/64" bit. This is the rod you're going to tap (thread) with a 6/32" tap (see illustration). Now, use a 6/32" tap to thread the second rod. If you've never used a tap before, you need to be patient and don't try to go through the entire rod right away. You'll need to turn the tap a quarter turn, back it off, turn it another quarter turn, back it off, and so on, until you get through. I know from experience, having broken off a tap in steel before.
Once you have the hole drilled in one rod and the other rod tapped, you need to drill 8/32" holes in the part of the clamp that mates together. The hole should be centered in the clamp and should match up with the two rods you've drilled holes in. This is where the screw will go. Once you've done this, you need to take a 6/32" x1/2" machine screw
and put it through the 8/32" hole in the first rod. Then push it through
the two holes in the clamp and line it up with the second rod on the other side
of the clamp. This screw should screw right into the hole you tapped. Screw
it down until it's snug. Now, loosen it up and take out the screw so you can
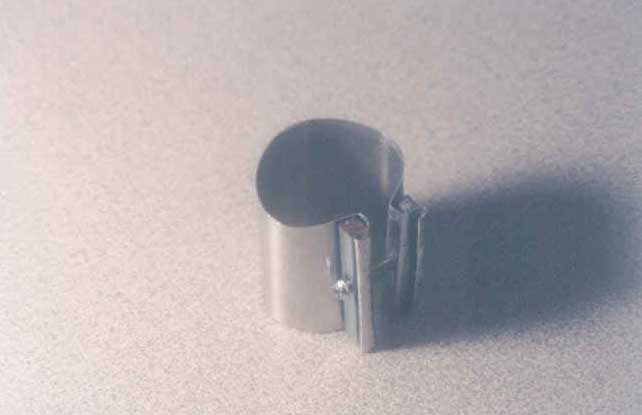
put it around the flash. (clamp3.gif - caption: Fig. 10 - Partially assembled clamp) Cut a piece of the black vinyl cloth so that it can cover the band of the clamp. You want to leave the jaws of the clamp exposed. Use double-sided tape to affix the vinyl to the band of the clamp. Now, put the clamp on the flash, making sure it's centered on the flash. Then put the two rods back in place, put the screw back in, and tighten it down.
Table Of Contents
|